I get commissions for purchases made through links in this post.
Over the next couple months we’ll be doing some trailer upgrades to make life a bit easier for us on the road. We learned some lessons last time. We’ve gone back and forth with whether to just buy a new trailer or stick with this one and do some work to upgrade it a bit. Neither of us have really shown interest in shopping for a new/used trailer in the past year. In addition, a *ton* of people have taken to the road during the past year to get out of their houses. This has significantly impacted the RV/trailer industry. Prices on trailers has really gone up. I get weekly emails begging me to sell/trade in my used trailer. In general, we aren’t unsatisfied with our trailer, we just have a few things we wish were different. Some of those are easy enough to change so we’ll just change them now.
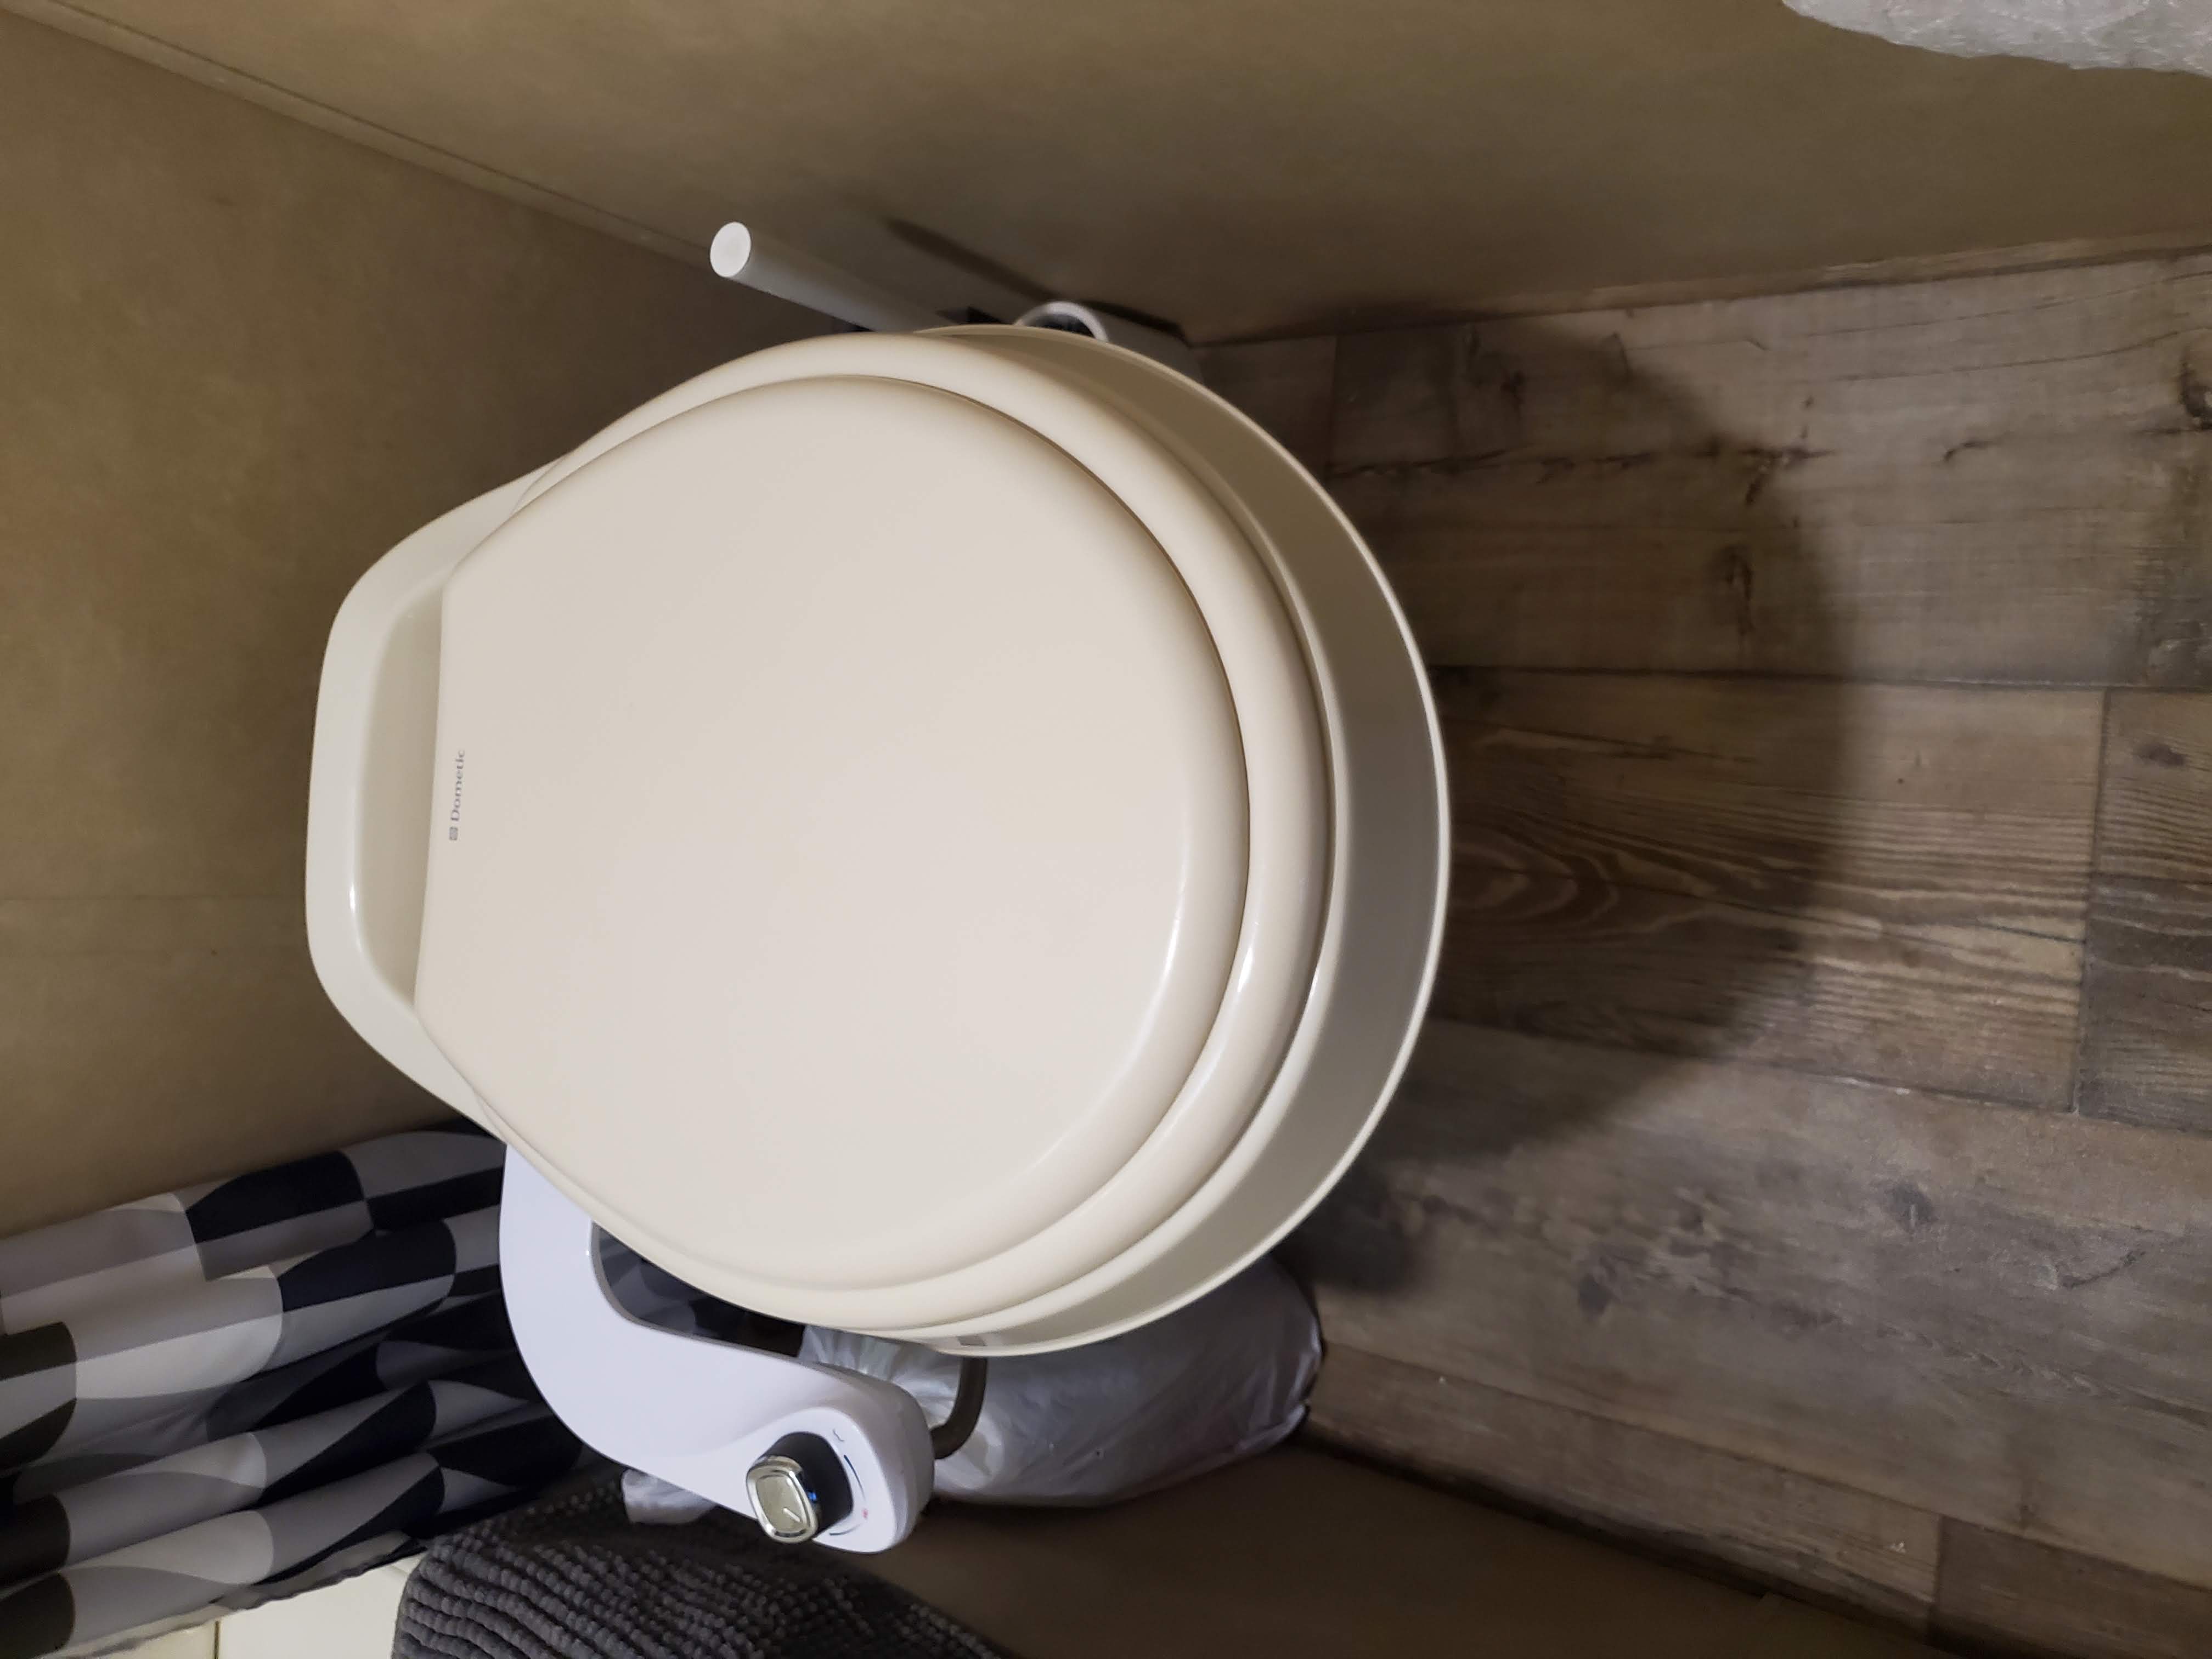
First up, we are adding a bidet to the toilet. Getting a bidet into an RV toilet is no easy feat. The cheaper RV toilets don’t use a standard residential style toilet seat. The main options were 1) buy a different RV toilet that does use the standard seat so that we can attach a bidet to it, 2) modify the existing toilet to accept the bidet attachment, 3) modify the bidet attachment to fit.
With some 3D CAD skills and a hand-me-down 3D printer, Liz was able to modify a $25 bidet plus the cost of plumbing fittings we would’ve needed anyway. Total cost: $25 (bidet) + $11 (tee) + $10 (valve) + $0 (adapter already on hand) = $46 (Note some prices may have changed in the links provided below since we purchased the items)
For those who wish to also do this upgrade, I’ve uploaded the 3D file to Thingiverse here.

The 3D file first must be printed 1 regular, and 1 mirrored. I chose a white color to blend in. The bidet attachment must be cut where the insert meets it as shown below. This must be done to clear the back portion of the toilet itself. Holes should be pre-drilled in the bidet attachment and in the 3D printed inserts approximately where shown. On the underside of the bidet attachment, there is a screwed on cover. It is important not to cut or drill into that cover. That cover is where the water lines to the bidet wands are going through. Do not attach the bidet to the toilet yet, however. Hookup all plumbing fittings first to ensure no leaks prior to attaching the bidet to the toilet.

Hook up the plumbing fittings according to the instructions in the bidet installation manual with the exception of the tee. You need to turn off all water pumps and disconnect any city water prior to starting. Try to empty the water lines as much as possible prior to disconnecting the toilet water line, and have a couple of towels on hand just in case. Disconnect the water line from the floor where it comes in. Install the water shutoff valve here as shown below. If the other fittings are plastic, you will not likely need teflon tape in order to prevent leaks. Test the valve for leaks by closing it and turning the water pump back on. If it doesn’t leak, you’re good to go! If you see some leaks, attempt to tighten it some more by using a crescent wrench. Be careful not to tighten too tight with plastic fittings. Once the shut off valve is in, reconnect the toilet hose to it.

On the back of the toilet, disconnect the water hose, and connect the tee. Use teflon tape on all fittings here. I found it easier to purchase a G1/2 tee and then add a 1/2 to 3/8 adapter than it was to find a 1/2 to 3/8 tee. If you can find a tee that has 3/8 on one side, good for you! Otherwise, an adapter of some sort seemed like the best option in this case. Another option would be to purchase a different hose from what came in the bidet installation kit. I happened to already have an adapter on hand, so I used what I had. It’s important to note here, that all of the plumbing fittings are straight thread MIP and FIP fittings with a rubber washer. This is what both the toilet/RV and the bidet uses. You should try to stick with that kind of thread scheme. In general, if a fitting uses a rubber washer, teflon tape is not necessary and can interfere with the seal. If you choose to use teflon tape, only wrap 1 to 1.5 times around the threads. Don’t go crazy wrapping it a bunch of times. More is not better in this case.

Once all the plumbing is hooked up, including to the bidet, test it by pointing the bidet down into the toilet and turning on the water shut off. Make sure all the connections are leak free. Secure the bidet to the toilet with screws as shown in the pictures above.
The toilet seat will interfere with the bidet unless the hinge point is raised. I corrected this by getting some steel pipe strapping and some plastic spacers. I cut pieces of strapping so that I had two full holes. The pieces were approximately 1″ long. I cut them curved to match the edge of the spacer so the seat wouldn’t hit any sharp edges. The original set screws went through the larger holes in the strapping pieces with a spacer sandwiched in between and then into the toilet seat. The original hinge on the toilet was sandwiched in between the strapping pieces and a 6-32 x 3/4″ machine screw went through the smaller hole and into a nut on the inside.

This project has been on my to-do list for ages. I’m so happy to have finally finished it. We have a couple more upgrades to come in the next week! I can’t wait to share those too!
Be the first to reply